Nav & Basic UI
Working with Boundaries / Geographies
Boundaries Tutorial Video
General Navigation
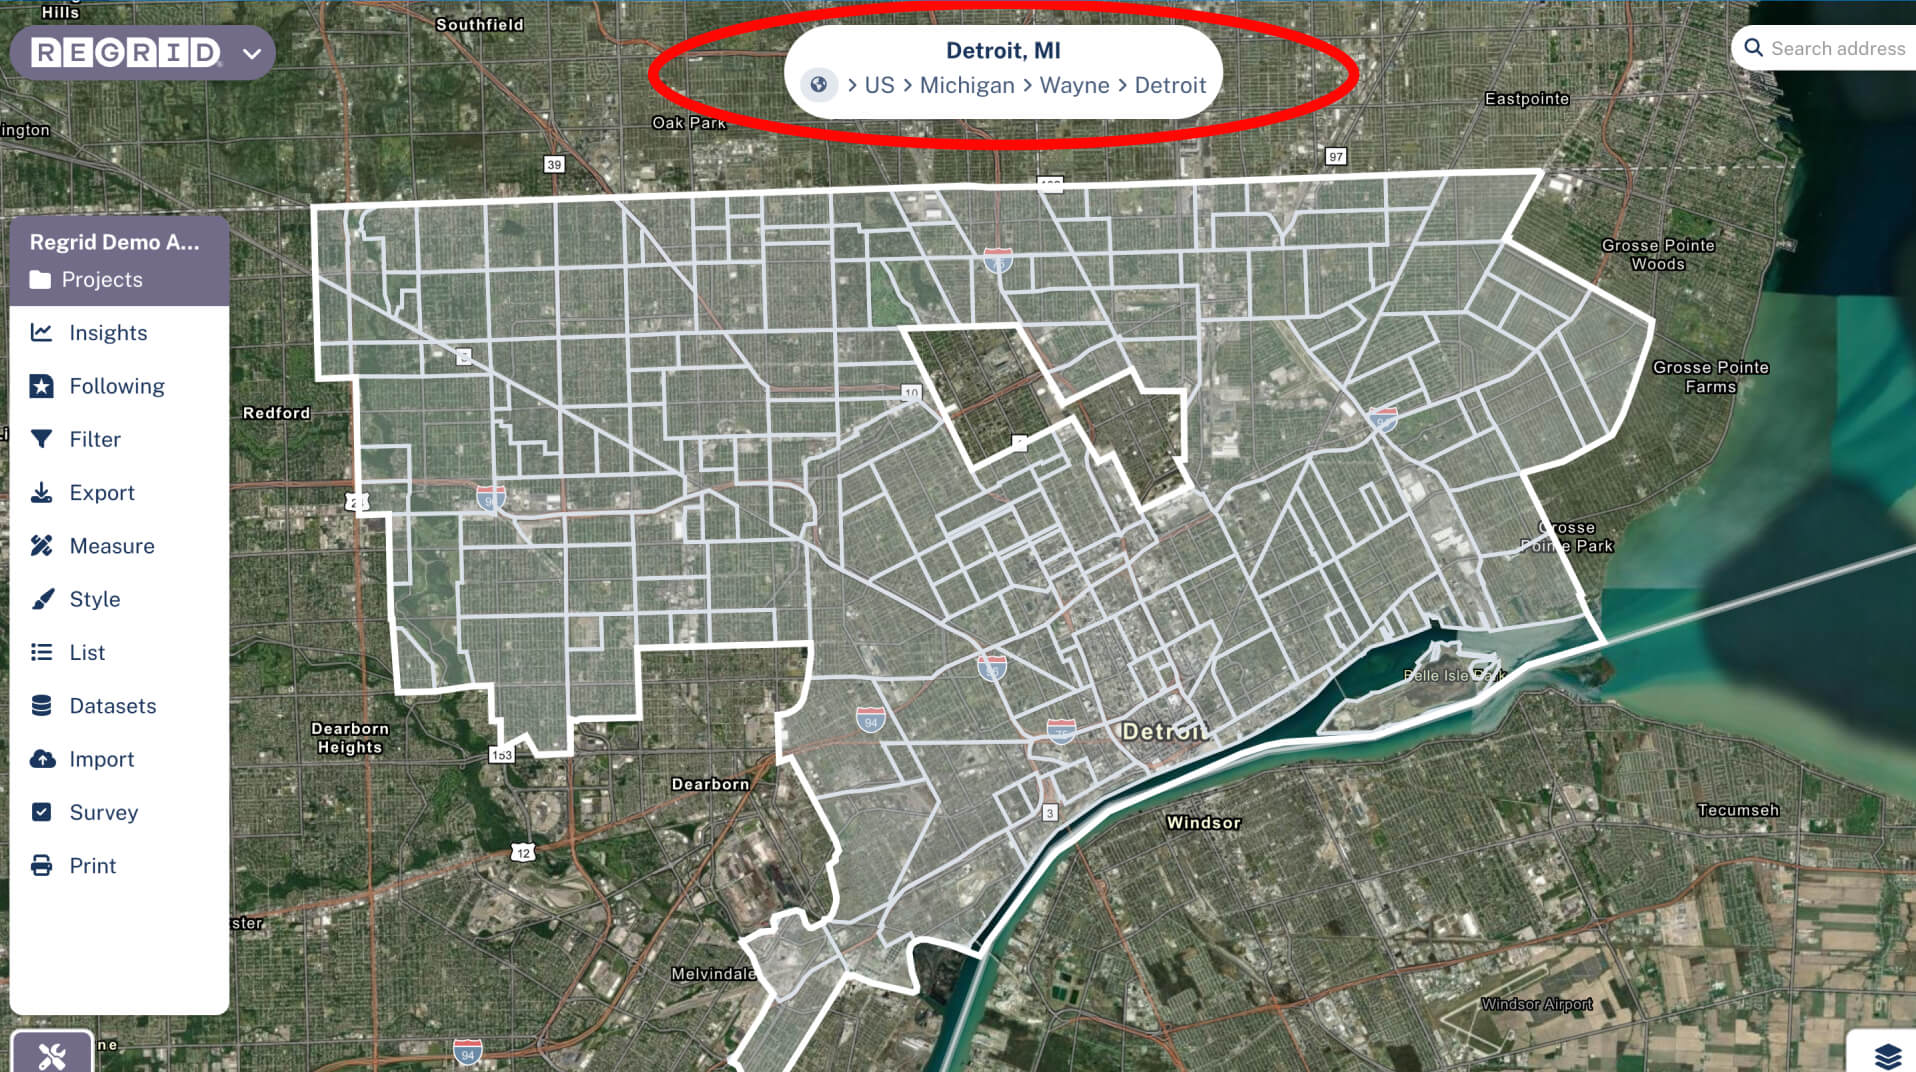
Up at the top center of the map, you'll see what we call the "breadcrumbs bar" - it shows the name of current place you are looking at on the map. You'll see it automatically change if you move the map around to always reflect the place you're viewing at the center of your map view.
If you want to select the place shown in the breadcrumbs bar, mouseover it and click the place of interest. Once selected, you can do things like Filter within the selected boundary, and save it as the default place to return to in the future.
Setting a Default Place for Your Project
Let's say that you want to set your boundary to Seattle, so that every time you open this Project, you get taken straight there. Easy!
Navigate to the boundary that you want to be your default place in the future
Click on the relevant portion of the breadcrumb bar to select it
If you're in a project, click the prompt in the breadcrumb bar that says, "Save your project home to X?", and you're done! Next time you open this project you'll be taken straight to this place.
For guidance on creating a project overall, see the "Using Projects in Regrid" support page.
Alternate Boundaries
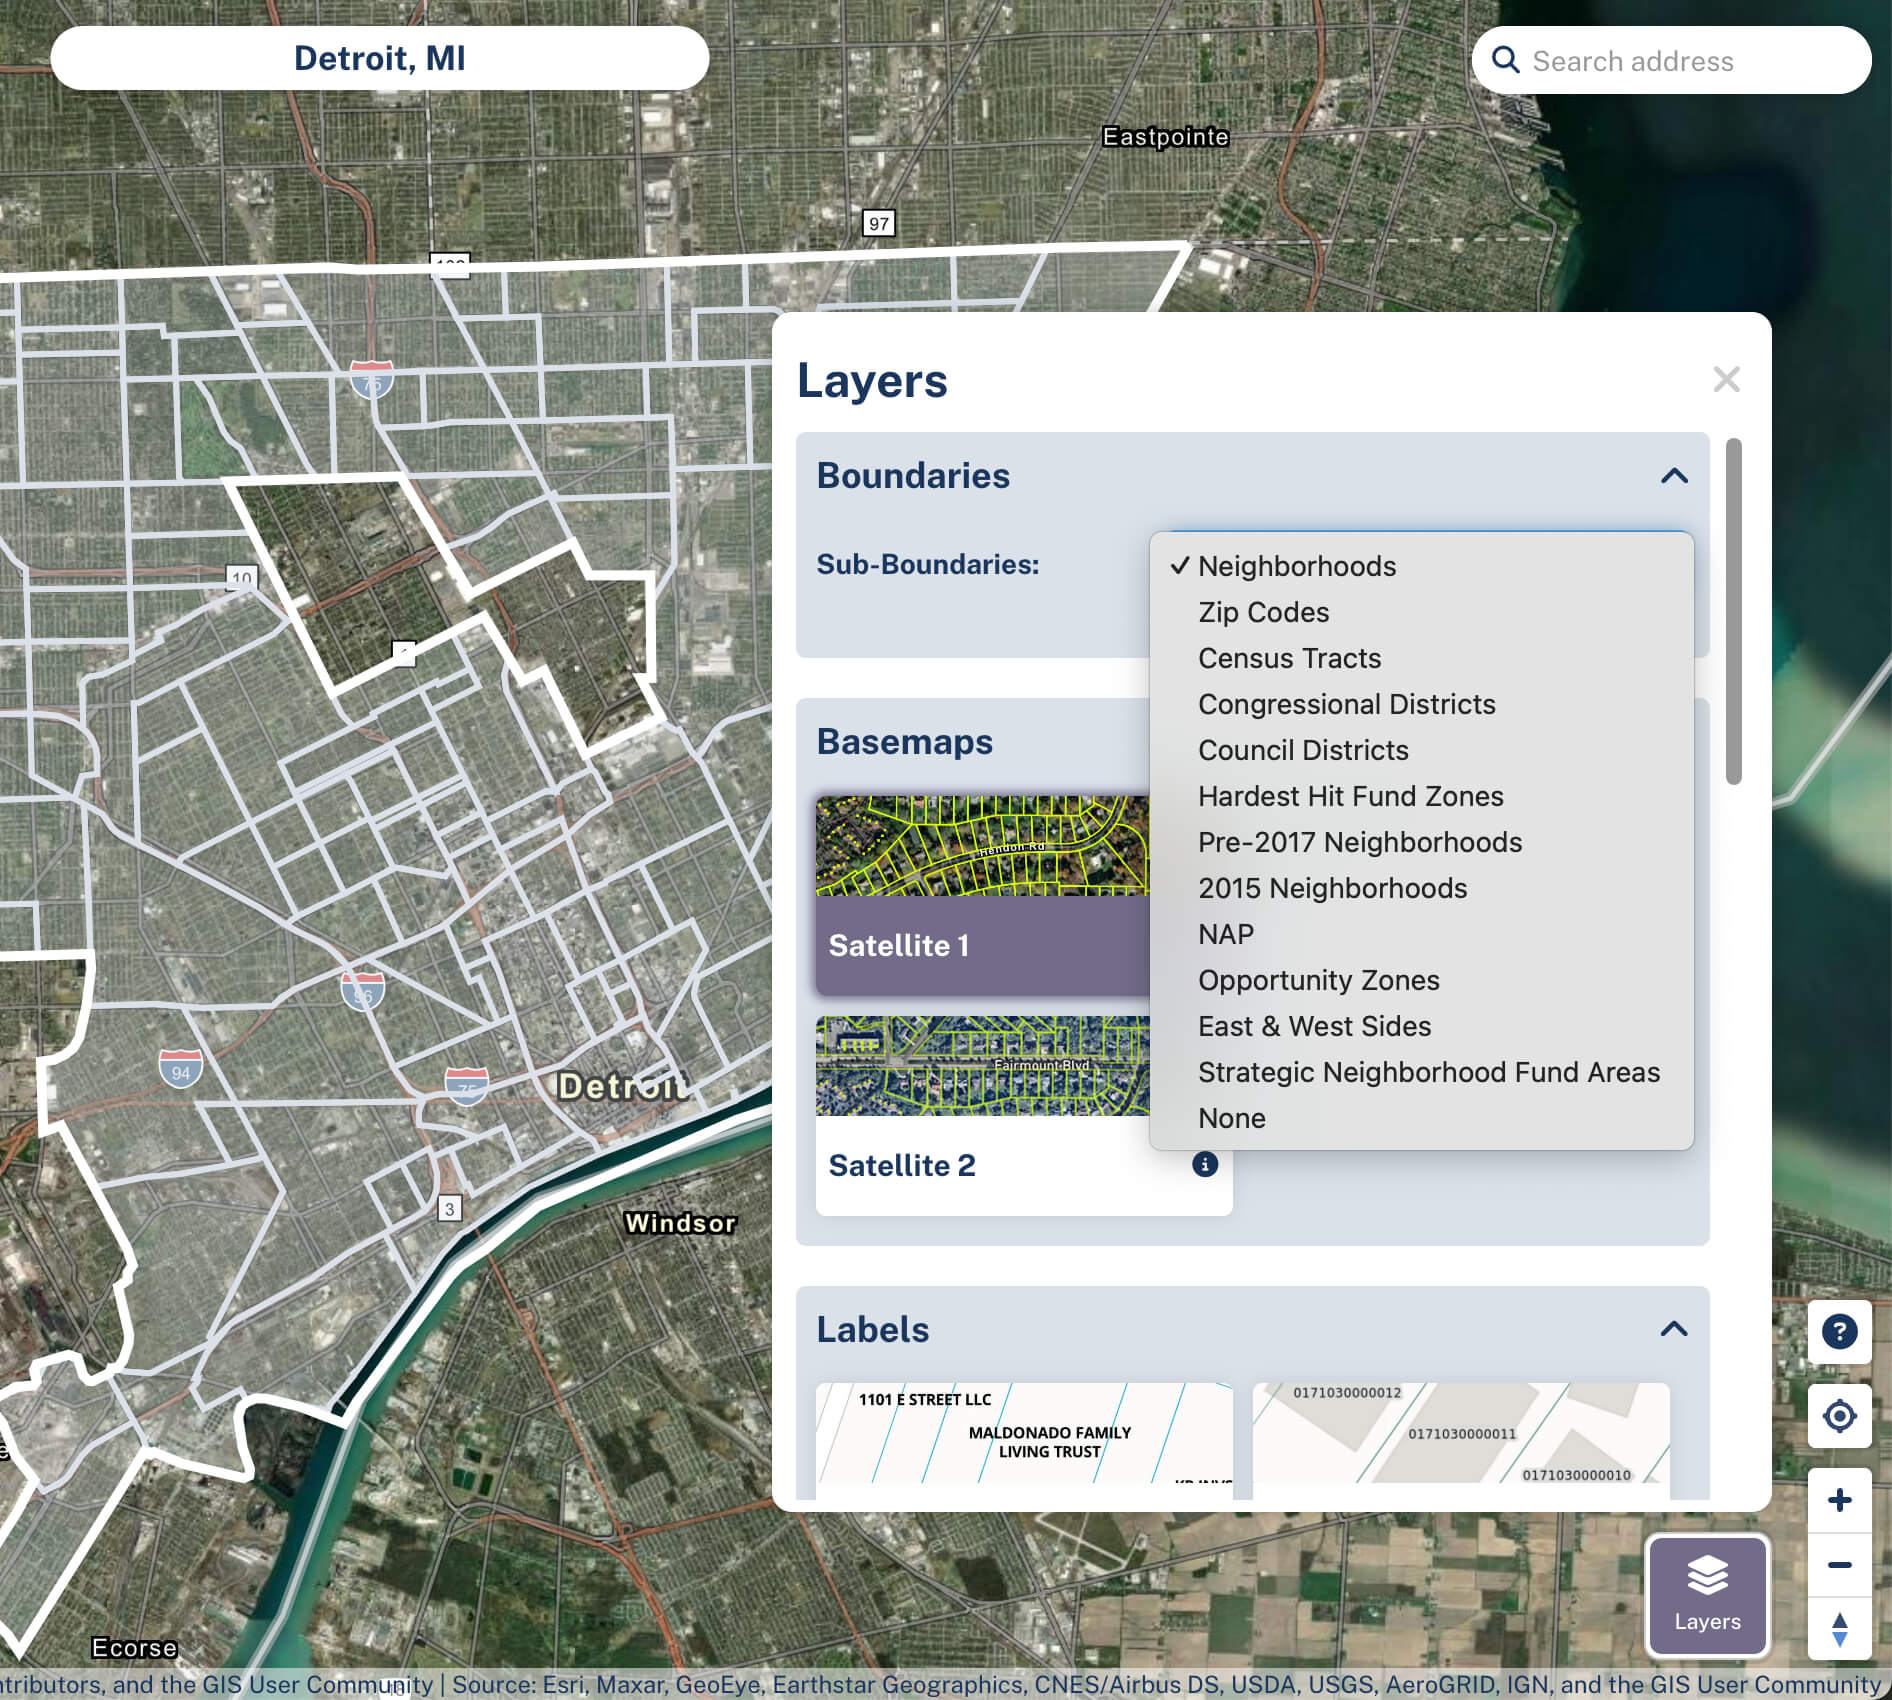
Under Layers button > Boundaries dropdown, you can see other available geographies; for example, you might be interested in Census Tracts than city boundaries. Please note that these options vary by what geography you have selected currently as well as where in the country you are - some places have more options available than others.
Drawing Your Own Focus Areas
Our Draw Focus Area tool allows you to create custom areas, which function just like any other boundaries across the site. Read more about that over in our Drawing Focus Areas & Measuring Distance article.
Using Projects in Regrid
Projects are only available with a Regrid Pro or Team account. Click here to upgrade your account.
After you’ve made an account (congrats!), the next thing you’ll probably want to do is create a project. Projects are where you can import data, make surveys, style information, and generally start to make sense of the information you’re viewing.
NOTE: Pro users are limited to 5 Projects at any one time (Team users have unlimited projects). If you reach your cap, you can repurpose existing maps or delete one from your Dashboard to free up space.
How to create a project
Simply click the “New Project” button above the ‘Projects’ dropdown if you're on your Dashboard:
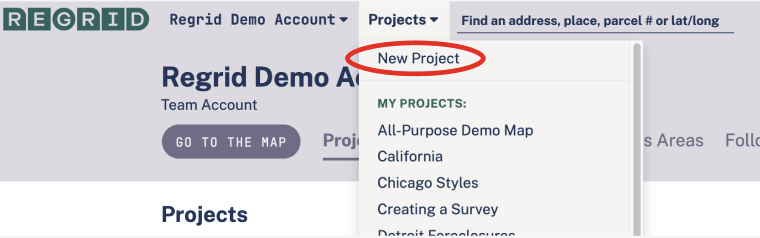
Or, if you're looking at the map, click the 'Projects' tab, at the top of the toolbar, then 'Create a New Project'.
After clicking, you'll be prompted to name your project, and that's it! You've successfully created a project to work in.
You may also want to set your project's default location (ie where you'll get zoomed to each time you open the project in the future). By default, the project will be set to the place you were looking at when you hit 'new project'. This video can show you how to change the default location to wherever you want.
Once you have a project set up
Once you have successfully created a project, you can start working with our mapping tools. Any Filters or Styles you set can be saved, so that you can return to them later when you reopen this project. Some suggestions:
Click “Filter” or “Styles” to start working with our base parcel data (after you import data, you can use these tools with those datasets as well).
Click “Import” to import your own data from a spreadsheet, or to connect with data from an open data portal.
Changing an existing Project's name
You can change the name of your Project at any time.
While working in the Project whose name you'd like to change, click the Project tab on the toolbar up at the top.
A drawer will pop out, where you will see a selection of Project settings. Change the name to whatever you desire, then press "Save Project" to make changes permanent.
You can also write a description in the box below the title. Descriptions can be useful when you want to do something like embed your map in a web page – your description will be a part of the embed, giving people an introduction to your map.
Deleting a project
If things start to get crowded and you want to delete a Project, no problem! It’s easy.
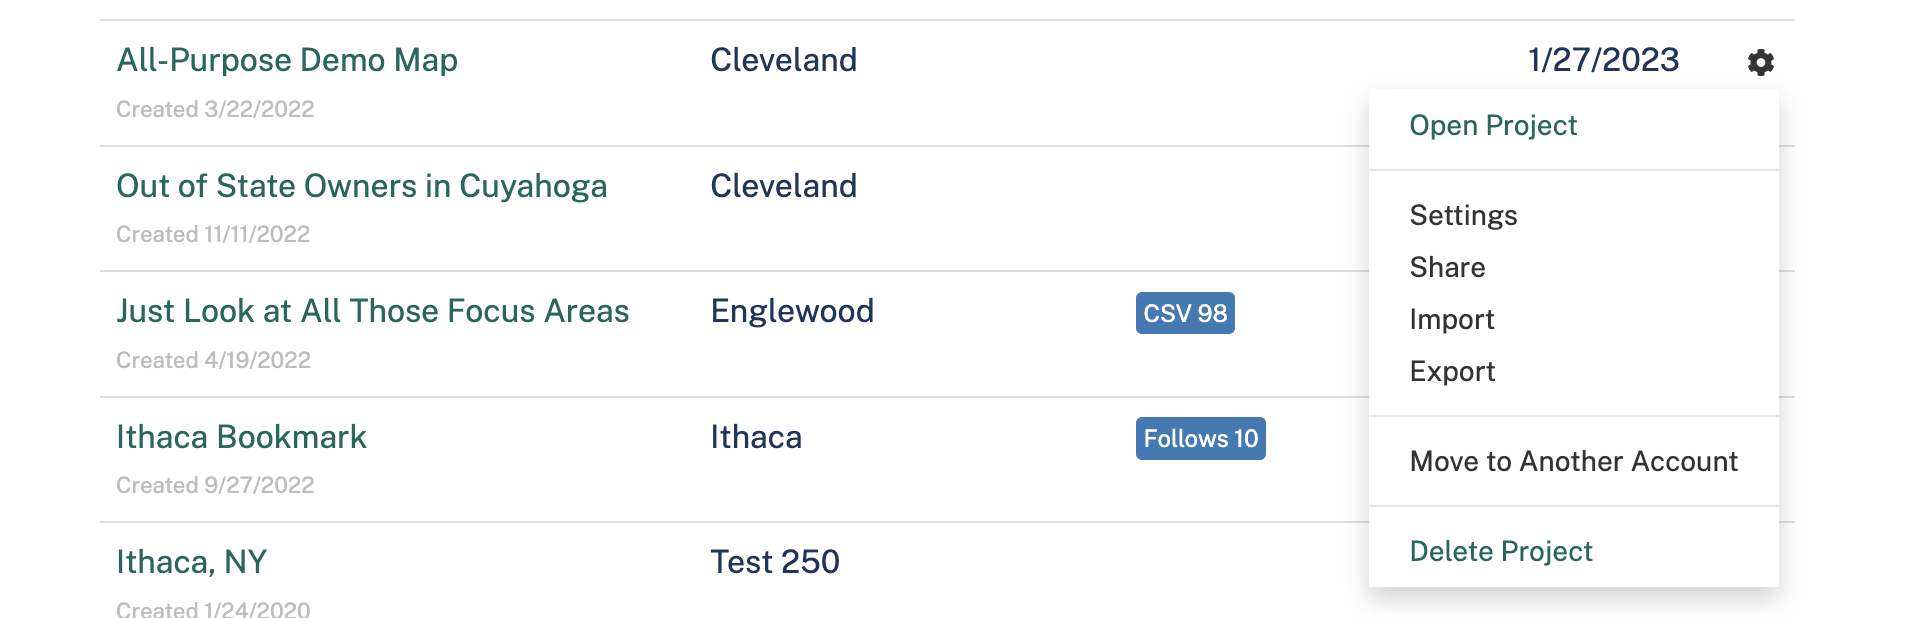
Simply go to your Dashboard (if you're looking at the map, you can do this by going up to the top left of your screen and clicking the Regrid dropdown menu up at the top left, then Dashboard) and locate the project you'd like to delete. Then, click the cog icon; from here you'll see a few options. Click 'Delete Project' to delete it.
Updated 7 months ago